- Your cart is empty
- Continue Shopping
How to Set Up and Use a Glucometer: A Comprehensive Guide

If you are someone who is looking towards proper diabetes management, then you must know that regular blood sugar monitoring is important and that a glucometer is a necessary tool that allows individuals to track their glucose levels effectively. Even if you are new to blood glucose monitoring or are just looking for tips to improve your testing routine, this guide can come in handy as it covers everything you need to know about setting up and using a glucometer properly.
The Importance of Glucose Monitoring
For an individual with diabetes, maintaining blood sugar levels within a target range is very vital to avoiding health issues. High blood sugar (hyperglycemia) or low blood sugar (hypoglycemia) can lead to serious health issues if proper care is not taken. Regular monitoring gives you insights into how factors such as food, exercise, medication, and stress can impact your blood sugar levels
Additionally, consistent monitoring helps:
- Track Progress: Get to know how well your diabetes management plan is progressing.
- Identify Patterns: Recognize trends in blood sugar levels over time.
- Prevent Emergencies: Early detection of dangerous highs or lows helps prevent health crises.
Step 1: Selecting the Right Glucometer
Choosing a glucometer that fits your needs and lifestyle is the first step. With so many options available in the market, it’s important to weigh your choices carefully.
Features to Consider
- Accuracy: Always go for a glucometer that meets ISO standards for accuracy. Reliable readings are important for effective diabetes management.
- Easy Use: A glucometer with a simple interface and clear display is perfect, mostly for older adults or those new to testing.
- Data Storage: Modern glucometers can store hundreds of readings, allowing users to review trends without keeping manual records.
- Connectivity Options: Devices with Bluetooth or app connectivity allow users to sync their data with smartphones for easier tracking.
Cost of Test Strips: Make sure the test strips are affordable and readily available, as they are an ongoing expense.
Types of Glucometers
Glucometers come in a variety of designs and functionalities, catering to different needs. Understanding the types available can help you select the one that best suits your lifestyle and health requirements.
1. Basic Glucometers
- These devices are straightforward, offering quick and reliable blood sugar readings.
- They are ideal for individuals who prefer a no-frills option without advanced features.
2. Smart Glucometers
- Equipped with Bluetooth or Wi-Fi, these devices sync readings with mobile apps or cloud storage.
- They allow users to track glucose trends over time and share data with healthcare providers.
3. Continuous Glucose Monitors (CGMs)
- Unlike traditional glucometers, CGMs use a sensor inserted under the skin to provide continuous readings.
- Ideal for individuals with Type 1 diabetes or those needing frequent monitoring without finger pricks.
4. Talking Glucometers
- Designed for visually impaired users, these glucometers provide audio feedback of readings.
- They are user-friendly and accessible for elderly individuals.
5. Multi-Parameter Monitors
- These devices measure not just glucose but other parameters like cholesterol or ketones, providing a holistic health overview.
- Useful for individuals managing multiple health conditions.
6. Pediatric Glucometers
- Specifically designed for children, these glucometers have smaller lancets and less intimidating designs to make the testing process easier.
By understanding the types of glucometers, you can match their features to your specific needs, whether it’s simplicity, advanced technology, or accessibility.
Step 2: Assembling Your Supplies
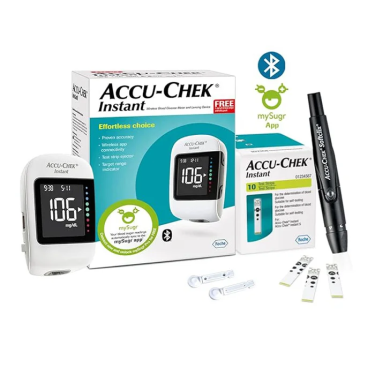
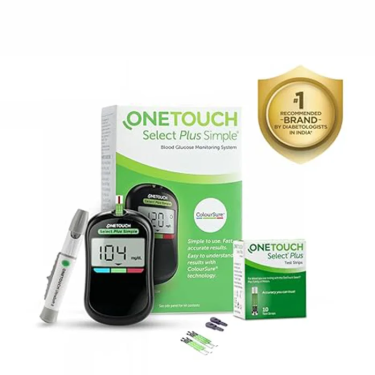
To get started, make sure that you have all the necessary supplies:
- Glucometer Device: The main unit for measuring blood sugar.
- Test Strips: Specific to the model of your glucometer. Each strip is single-use.
- Lancing Device and Lancets: Made for pricking the skin and drawing blood samples. Lancets must be replaced after every use.
- Alcohol Swabs: To sanitize the testing area and avoid contamination.
- Logbook or App: For recording results if your glucometer doesn’t store them.
Step 3: Setting Up Your Glucometer
Setting up your glucometer correctly guarantees that you will get accurate readings. Follow these steps:
- Unbox and Inspect: Check for any damage to the glucometer or accessories. Make certain that the test strips are within their expiry date.
- Install the Battery: Most glucometers come with a pre-installed battery. If not, insert the provided battery.
- Calibrate the Device: Some devices need calibration with a control solution or a special test strip to guarantee accuracy. Follow the manufacturer’s instructions.
- Set Date and Time: Accurate time-stamping of results helps in identifying patterns over days or weeks.
- Perform a Trial Run: Use the control solution provided with your glucometer to verify it is working correctly before your first test.
Step 4: Using the Glucometer
1. Prepare Yourself and the Device
a. Clean your hands thoroughly with warm water and soap. Dry them completely to make sure no moisture dilutes the blood sample.
b. Prepare the lancing device by inserting a lancet and setting the depth. Adjust the depth based on your skin type; a shallower setting is adequate for soft skin.
2. Insert the Test Strip
a. Insert a test strip into the glucometer. The device will typically power on automatically when a strip is inserted.
3. Prick Your Finger
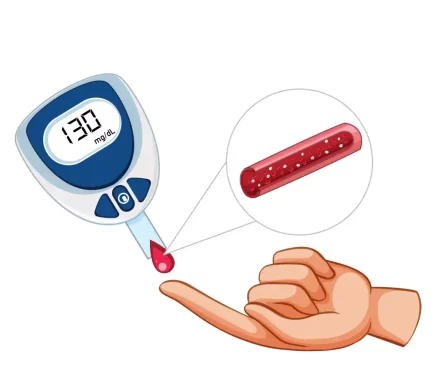
a. Use the lancing device to prick the side of your fingertip, as it tends to be less sensitive than the center.
b. Gently squeeze your finger to produce a drop of blood. Avoid squeezing too hard, as this can affect the composition of the blood sample.
4. Apply Blood to the Strip
a. Place the drop of blood onto the area assigned for it on the test strip. The glucometer will draw in the blood automatically.
5. Wait for the Reading
a. The glucometer will process the sample and display your blood sugar level within a few seconds.
6. Record the Results
a. Note the reading in your logbook or allow the glucometer to save it automatically. Some devices sync the data with an app, eliminating the need for manual recording.
Step 5: Proper Disposal of Materials
Dispose of used test strips and lancets responsibly. Place them in a puncture-proof container, such as a sharps container, to prevent injuries. Always follow the regional rules & regulations while disposing of medical waste.
Best Practices for Accurate Results
- Check Strip Expiry Dates: Expired strips can lead to false readings.
- Store Supplies Correctly: Keep the test strips in their original container, away from heat and moisture.
- Use Control Solution Regularly: Test your glucometer’s accuracy with a control solution every few weeks or after any errors.
- Test at the Right Time: Follow your healthcare provider’s guidance on testing schedules, such as fasting levels or post-meal readings.
How Often Should You Test?
The frequency of testing differs based on your type of diabetes and treatment plan:
- Type 1 Diabetes: Typically requires multiple tests daily, including before meals and at bedtime.
- Type 2 Diabetes: Testing once or twice a day may be enough, depending on medication and lifestyle.
- Pregnancy: Gestational diabetes may ask for frequent testing to make sure of stable blood sugar levels.
Testing more frequently during illness or periods of high stress can also help manage unexpected fluctuations.
Troubleshooting Common Issues
1. Error Messages
If your glucometer displays an error message:
- Make certain that the test strip is inserted correctly.
- Check that the blood sample is sufficient.
- Replace the battery if necessary.
2. Inconsistent Readings
- If readings differ significantly, test your glucometer’s accuracy using the control solution.
- Contact your healthcare provider if the issue persists.
Advanced Features in Modern Glucometers
Glucometers have evolved to offer advanced capabilities:
- Bluetooth and App Integration: Sync your readings with your smartphone for easy tracking and sharing with healthcare providers.
- Voice Assistance: Helps visually impaired users get accurate readings.
- Continuous Glucose Monitoring (CGM): Some devices now offer real-time glucose trends without the need for frequent finger pricks.
Additional Tips for Effective Monitoring
- Rotate Testing Sites: Repeatedly using the same finger can cause soreness. Rotate between fingers to reduce discomfort.
- Test During Normal Activities: Regular testing helps understand how your daily activities affect blood sugar levels.
- Stay Consistent: Test at the same time each day to make sure results are comparable.
Common Questions About Glucometers
How Long Does a Glucometer Last?
Most glucometers are designed to last for years with proper care. Regular calibration and avoiding exposure to extreme conditions can extend their lifespan.
Can Children Use a Glucometer?
Yes, glucometers are safe for children under supervision. Pediatric lancets and glucometers designed for smaller hands are available.
What If I Don’t Have Enough Blood for a Sample?
If the blood sample is too small, some glucometers allow for a second attempt on the same strip. Always check your device’s manual for such features.
Monitoring your blood sugar with a glucometer is one of the most effective ways to manage diabetes and maintain overall health. With proper setup, regular use, and attention to detail, you can turn this daily task into a valuable part of your healthcare routine. By investing in quality health care products like glucometers and accessories, you make sure of accurate readings that bring about better decision-making.


